
Baby Back Ribs on the Pellet Grill
Making tender, juicy and eye-catching baby back ribs can be a challenge. Thousands of online recipes promise their recipe is the best and only way to make incredible ribs. The great thing about cooking is that much of the final result is not factually driven and just based on the end user’s preference.
We don’t claim this is the definitive way to make the best ribs ever. We do feel confident that this method is a sure-fire way to make insanely tasty ribs that you would be proud to eat and serve to your family and friends.
While we are making these baby back ribs on the Weber Searwood Xl 600 Pellet Grill, you can follow the same method with any pellet grill. You can also follow the same method with a charcoal or gas grill. The method we outline in this recipe is mainly temperature and time based.
Tools Needed For Prep
To be clear, you do not need every tool that is going to be listed. However, having all of these tools will allow you to have very similar results AND it will make cleaning up a breeze.
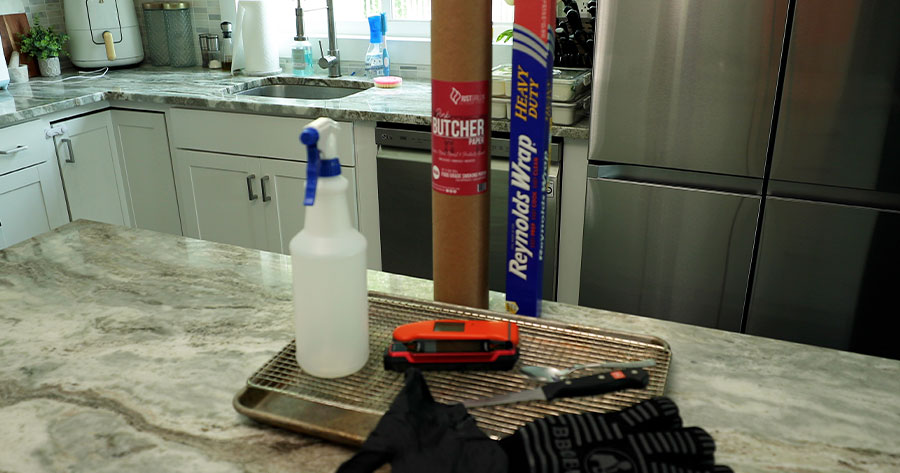
Tools Needed
- Weber Searwood XL 600 Pellet Grill or any pellet, charcoal or gas grill of your preference.
- Raised Rim Aluminum Tray
- Wire Pan Cooling Rack
- Fireboard Spark Instant-Read Thermometer
- Wusthof 7″ Fillet Knife
- Butcher Paper
- High-Heat Gloves
- Disposable Gloves
- Basting Brush
- Spray Bottle
- Aluminum Foil Roll
- Spoon
- Paper Towels
The most important tools from the list that you would be wise to invest in include the aluminum tray and wire rack, Fireboard Spark, high-heat gloves and butcher paper roll. Everything on the list is useful and has many other cooking uses beyond just making ribs. The items we just highlighted in particular are useful to make this as simple and easy of a cook as possible.
The tray and wire rack make it easy to move the ribs from the kitchen to the grill and back as needed throughout the cook. You’ll need the high-heat gloves to pick up the tray since it will be hot to the touch. The butcher paper is a superior option compared to aluminum foil for wrapping smoked meats. The reason is butcher paper allows steam to escape while insulating your food. Aluminum foil insulates your food but it locks steam inside. This is in turn softens the exterior bark on foods. While ribs are not known for their exterior bark, you still want a nice solid exterior versus soft top.
Supplies Needed
Flavors are always a preference choice and you certainly can use different fuel, seasonings or sauces if you prefer. The key part of this recipe is just following the cooking method and steps. The flavors we use do pair for these ribs are incredible and you would be happy with them.
Sweet Heat
- Heath Riles Garlic Jalapeno Seasoning
- Killer Hogs Hot BBQ Rub
- Texas Pepper Jelly Apple Cherry Sweet Sauce
Sweet and Sticky
The flavor profile of the sweet heat style is not overly spicy. It is more zesty than spicy. Do not let the garlic jalapeno or hot rub seasoning names fool you. They are not very spicy or hot at all. The person that made this recipe is a wimp when it comes to food of medium heat level.
The sweet and sticky profile has a sweetness to it but is not overly sweet to the point of being too sweet. This combo has a nice mild sweetness that you can enjoy while eating.
Other Supplies
- Butter (preferably unsalted)
- Apple Juice (your choice of brand)
- Weber Grillmaster Pellet Blend (Cherry, Hickory & Maple)
Meat Selection
Baby Back Ribs will vary slightly in taste and tenderness due to the various different farms and suppliers across the country. Some will have more fat or meat than others. Pork is not graded like beef. You will not find options like select, choice, prime and other grades. So if you come across packaging that claims this, don’t let it fool you. It’s nothing more than a marketing buzzword.
What you should do, however, is try baby back ribs from different vendors to see what you prefer best. We tend to reach for the Prairie Fresh brand of pork products. They tend to be consistent and have good quality in general.
Cooking Instructions
- To avoid making a mess during prep, lay down a sheet, or multiple sheets, of aluminum foil on your countertop or prep surface. Once covered, bring your ribs from the fridge and remove from packaging.
- Turn the rib(s) face down with the underside facing up. Using paper towels, thoroughly pat the underside dry. You may need to do a second pass with a fresh, dry paper towel.
- Locate the rough center of the ribs. Using the backend of the spoon, work the spoon handle in between two bones to help loosen the membrane. Do not gouge the meat while doing this. Go slow and aim to get the spoon at most halfway across the slab. Once you reach that point, do not use the spoon anymore. Begin to finish loosening the membrane with your index finger.
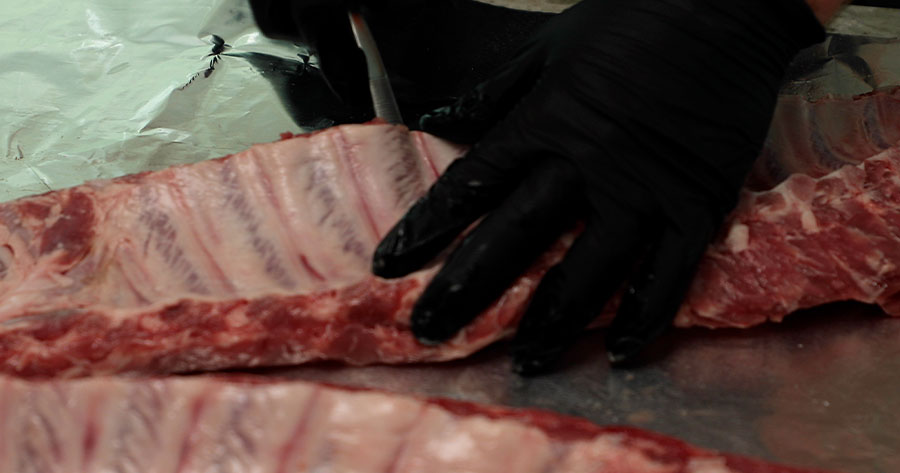
4. Using one hand, apply even pressure, while alternating sides, to slowly lift and peel the membrane away from the underside of the slab. Go slow so the membrane does not tear. Do not stress if it does. You can still remove it. It might just be tougher to get a solid grip on the membrane as you finish peeling it.
5. This step is optional. With the membrane removed, you can choose to do a light trimming. The purpose of this is to remove areas of heavy fat or end pieces that will not cook well. Do not go overboard on the trimming. You just want to take off thick pockets of fat and square up the appearance of the slab. Do no cut into the meat when trimming.
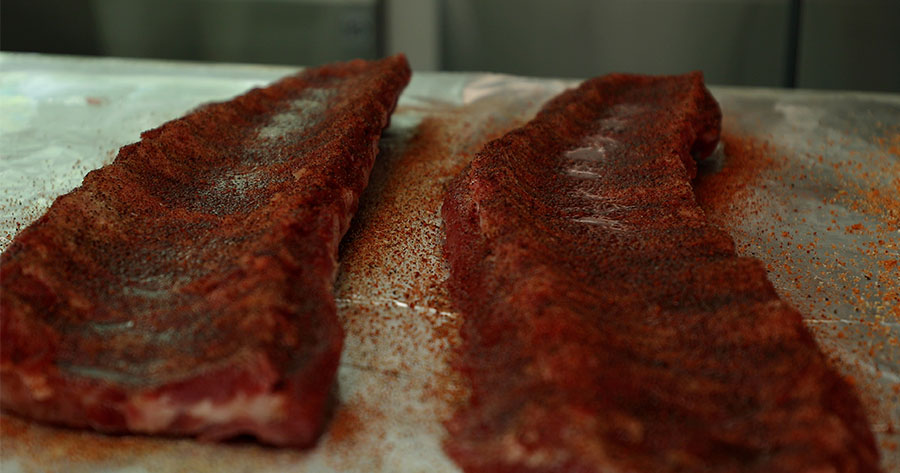
6. Begin to season the slab(s). Start with a base layer on the underside of the slab(s) with the garlic jalapeno seasoning or SPG seasoning depending on which style of ribs you choose to make. Do not coat the entire bottom to where the meat is not visible. We will be applying a second layering seasoning and need to leave surface area for this to adhere. Using either the hot rub or butter pecan, generously coat the underside to cover. We use the seasonings with more color last as they help create a better appearance on the finished product.
Allow the seasonings to sweat in for 15-20 minutes. You could also choose to apply yellow mustard before seasoning. This helps the seasoning stick faster to the ribs. It doesn’t affect the flavor. If you plan ahead and are in no rush, there’s no need to do this.
Once you see a good amount of adhesion with the seasoning and liquid pooling, turn the slab(s) over and repeat the seasoning process for the topside. Allow another 15-20 minutes to sweat in.
7. Start your pellet grill and set the grill to 275° F. Make sure your grill has enough fuel in the hopper. If you are using a gas grill, turn the grill on to medium-low heat to achieve this temperature at the grate level. If using a charcoal grill, you most likely will need to start that before prepping the ribs with seasonings.
8. Once the grill reaches 275° F, let is stabilize for 10-15 minutes.
9. Take the raised-rim aluminum tray and line the pan with aluminum foil. Add the wire cooling rack to the top. Then transfer your slab(s) face up to the wire rack. It’s time to start the clock and add the ribs to the grill.
10. Cook the ribs, topside face up, for two hours uncovered. If using a pellet grill, you can put the tray on the lower bottom grates. If using a gas grill, you may need to use the top rack in your grill for placement.
11. During these two hours we will spritz the ribs every half hour with apple juice. You could choose to spritz every 15-20 minutes but that is your choice. We prefer every 30 minutes to limit the amount of times the grill lid is open. When spritzing, a simple back and forth works. No need to drown the ribs in apple juice.
12. After the two hours is up remove the rib(s) from the grill using your high-heat gloves. It is time to wrap the ribs in butcher paper.
13. Before beginning to wrap, adjust your grill to a new set temperature of 325° F. This is the temperature the slab(s) will finish cooking at.
14. Cut the butcher paper to be longer than the ribs by a decent amount. If you end up cutting it too short, you will just need to double wrap. That is not a big deal.
With the butcher paper laid out, spray apple juice around the paper to make it pliable. This helps it fold easier. Cut three or four pieces of unsalted butter to lay across the center of the paper. You do not need large chunks but this is up to your discretion. If making the sweet heat style, sprinkle more of the hot rub in the wrap around the butter. If making the sweet and sticky, pour maple syrup in an S-figure pattern around the butter.
Lay the ribs topside face down in the butter. Add the same amount of butter to the underside of the ribs that is now face up. You can add more seasoning if you want but we typically do not. If making the sticky ribs, add maple syrup to the underside.
To wrap the ribs, fold up and over the slab the closet bottom side of the paper to you. Then fold in the left and right. Pull towards you and fold over and under the remaining section of the wrap. Make sure the last fold tucks under the slab nicely. You are using the gravity of the ribs to hold this down.
Return the slab(s) to the tray with the topside face down. Add back to the grill for one more hour.
15. After one hour, it is time to use an instant-read thermometer to check the ribs. Make sure you are inserting the thermometer between the bones and not touching the bones. Touching a bone will give you a false reading. You want to check the thickest section of the meat. The ideal internal temperature is 201° F to 203° F. If the ribs are not quite there, rewrap and check accordingly until they have reached this internal temperature.
16. Once ready, pull from the grill and remove from the wrap. Return the ribs topside face up to the wire rack. Get your basting brush and sauce or maple syrup. Make sure the sauce is room temperature or warmed up. Pour the sauce and over the ribs and lightly use the basting brush to spread around for good surface coverage. Once finished, return the ribs to the grill for another 10-15 minutes. This will allow the sauce to tack on better.
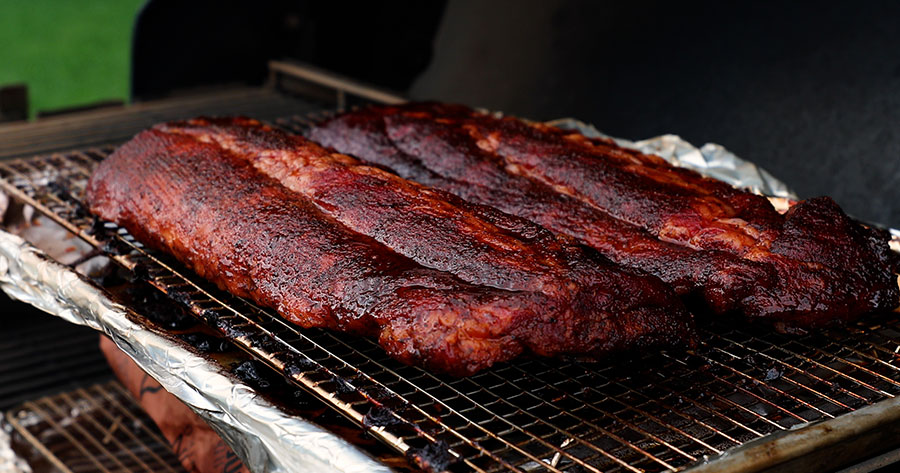
17. Once the sauce has tacked on to your liking, remove from the grill and wait 5 minutes to slice. When slicing, it is easiest to turn the ribs upside down to slice between the bones. Slice and serve!
Questions?
If you followed everything laid out in this from tools, supplies and instructions, your ribs should be some of the most incredible that you have ever tasted. They should be juicy, tender and cleanly pull away from the bone with ease when biting.
If you have any questions on this recipe or the products used, please reach out to us via comment on our YouTube video above or fill out the contact form on our website. Hope you enjoy the ribs!